A Step-By-Step Tutorial On How To Make A Cinemagraph With Photoshop
Ever wanted to make one of those snazzy cinemegraphs you see on Instagram and Facebook?
In this introductory tutorial, we’ll be learning how to turn a still image into an animated GIF using Photoshop. This is an easy, cool trick that I call a ‘faux’ cinemagraph. I’ll be covering the standard approach of using a video clip or photo burst in a future tutorial.
Follow the step by step guide below or watch the video tutorial:
What you’ll need
- Photoshop - You can download a 7 day FREE trial here (https://www.adobe.com/products/photoshop/free-trial-download.html)
- Sample file to practice with. Download HERE
OKAY!! Let’s get started! Here are the steps that we are going to follow:
Step 1: Import Image And Prepare Your Base Layer

Open Photoshop and import the image you will be working with.
File > Open and locate the file (OR drag the image inside Photoshop’s workspace).
Next in order to animate the image we need to convert our photo from a background layer to regular layer (because background layers cannot be animated). Place your mouse on top of the Background layer in the Layer panel and double click. A dialog box called “New Layer” will pop up, set layer name to “1” and click “OK"


Step 2: Create Layers For Your Animation
From the tool panel on your left hand side select circle the marquee tool

Use the circle marquee tool to select the laundry machine door. It might take few tries - that’s okay! Aim to place your selection along the black rubber around the glass part of the door.

Once you are happy with the selection go to the Select > Modify > Feather menu

A dialogue box will pop up. Here you can control the amount of feather you want. I’m going to go with the suggested 20. Click “OK”.

Next on your keyboard press Command + C and then Command + V. Initially it might seem like nothing has changed but if you look in your Layer panel you’ll see that you’ve created a new layer.

Now it’s a good time to rename your new layer. Double click on the layer panel and type in “2” then press Enter.
Getting into the habit of naming your layers and organizing them will be extremely useful when you start creating more complicated Photoshop projects.

If you click the Eye icon on layer “1” you will be able to see the feather effect you’ve just created.
Note: Don’t forget to click the eye icon again to turn the layer back to visible.

Feather replaces solid color pixels with transparent pixels to achieves a smoother transition
Select layer “2” by clicking on it once. From your keyboard press Command + T. In the top menu next to the angle icon enter 40. This tells Photoshop that you want to rotate your layer 40 degrees clockwise. Next press Enter twice (first press approves the rotation degree, second press releases the layer).

Good job! Now we are going to repeat this same action 5 more times until we have a total of 7 layers. Every layer rotates the laundry machine by 40 degrees. We aim to create one full cycle for this animation.
Drag layer 2 down into the “New Layer” icon. That creates an identical copy of the layer. Rename the new layer to “3”. Press Command + T. Set the rotation angle to 40. Press Enter twice.
Repeat the same actions until you have a total of 7 layers.

Step 3: Animate Your Frames
Open the Timeline panel by going to Window > Timeline

In the center of the Timeline panel click the “Create Frame Animation” button (if the button says “Create Video Timeline” you can change that through the drop-down arrow on the right)

The units in the Timeline panel are called “Frames” and the units in the Layer panel are called “Layers”.
Once you press the “Create Frame Animation” button a frame will automatically be created in your Timeline panel.
First step for frame 1 is to turn off visibility on layers 2 to 7 in the Layers panel

Create a new frame by pressing on the duplicate icon (see image below)

For the new Frame 2 turn on visibility on Layer 2

Repeat the same action until you have 7 Frames.

YOU MADE IT! Preview your animation by pressing the play button on the Timeline control panel

The default setting will play Frames 1 to 7 once and then stop. We want this to be a cinemagraph and loop forever so change the drop down that says “Once” to “Forever”

You can also assign custom duration to each frame. For this exercise I’m going to leave the duration to “0 sec”

Step 4: Export a GIF
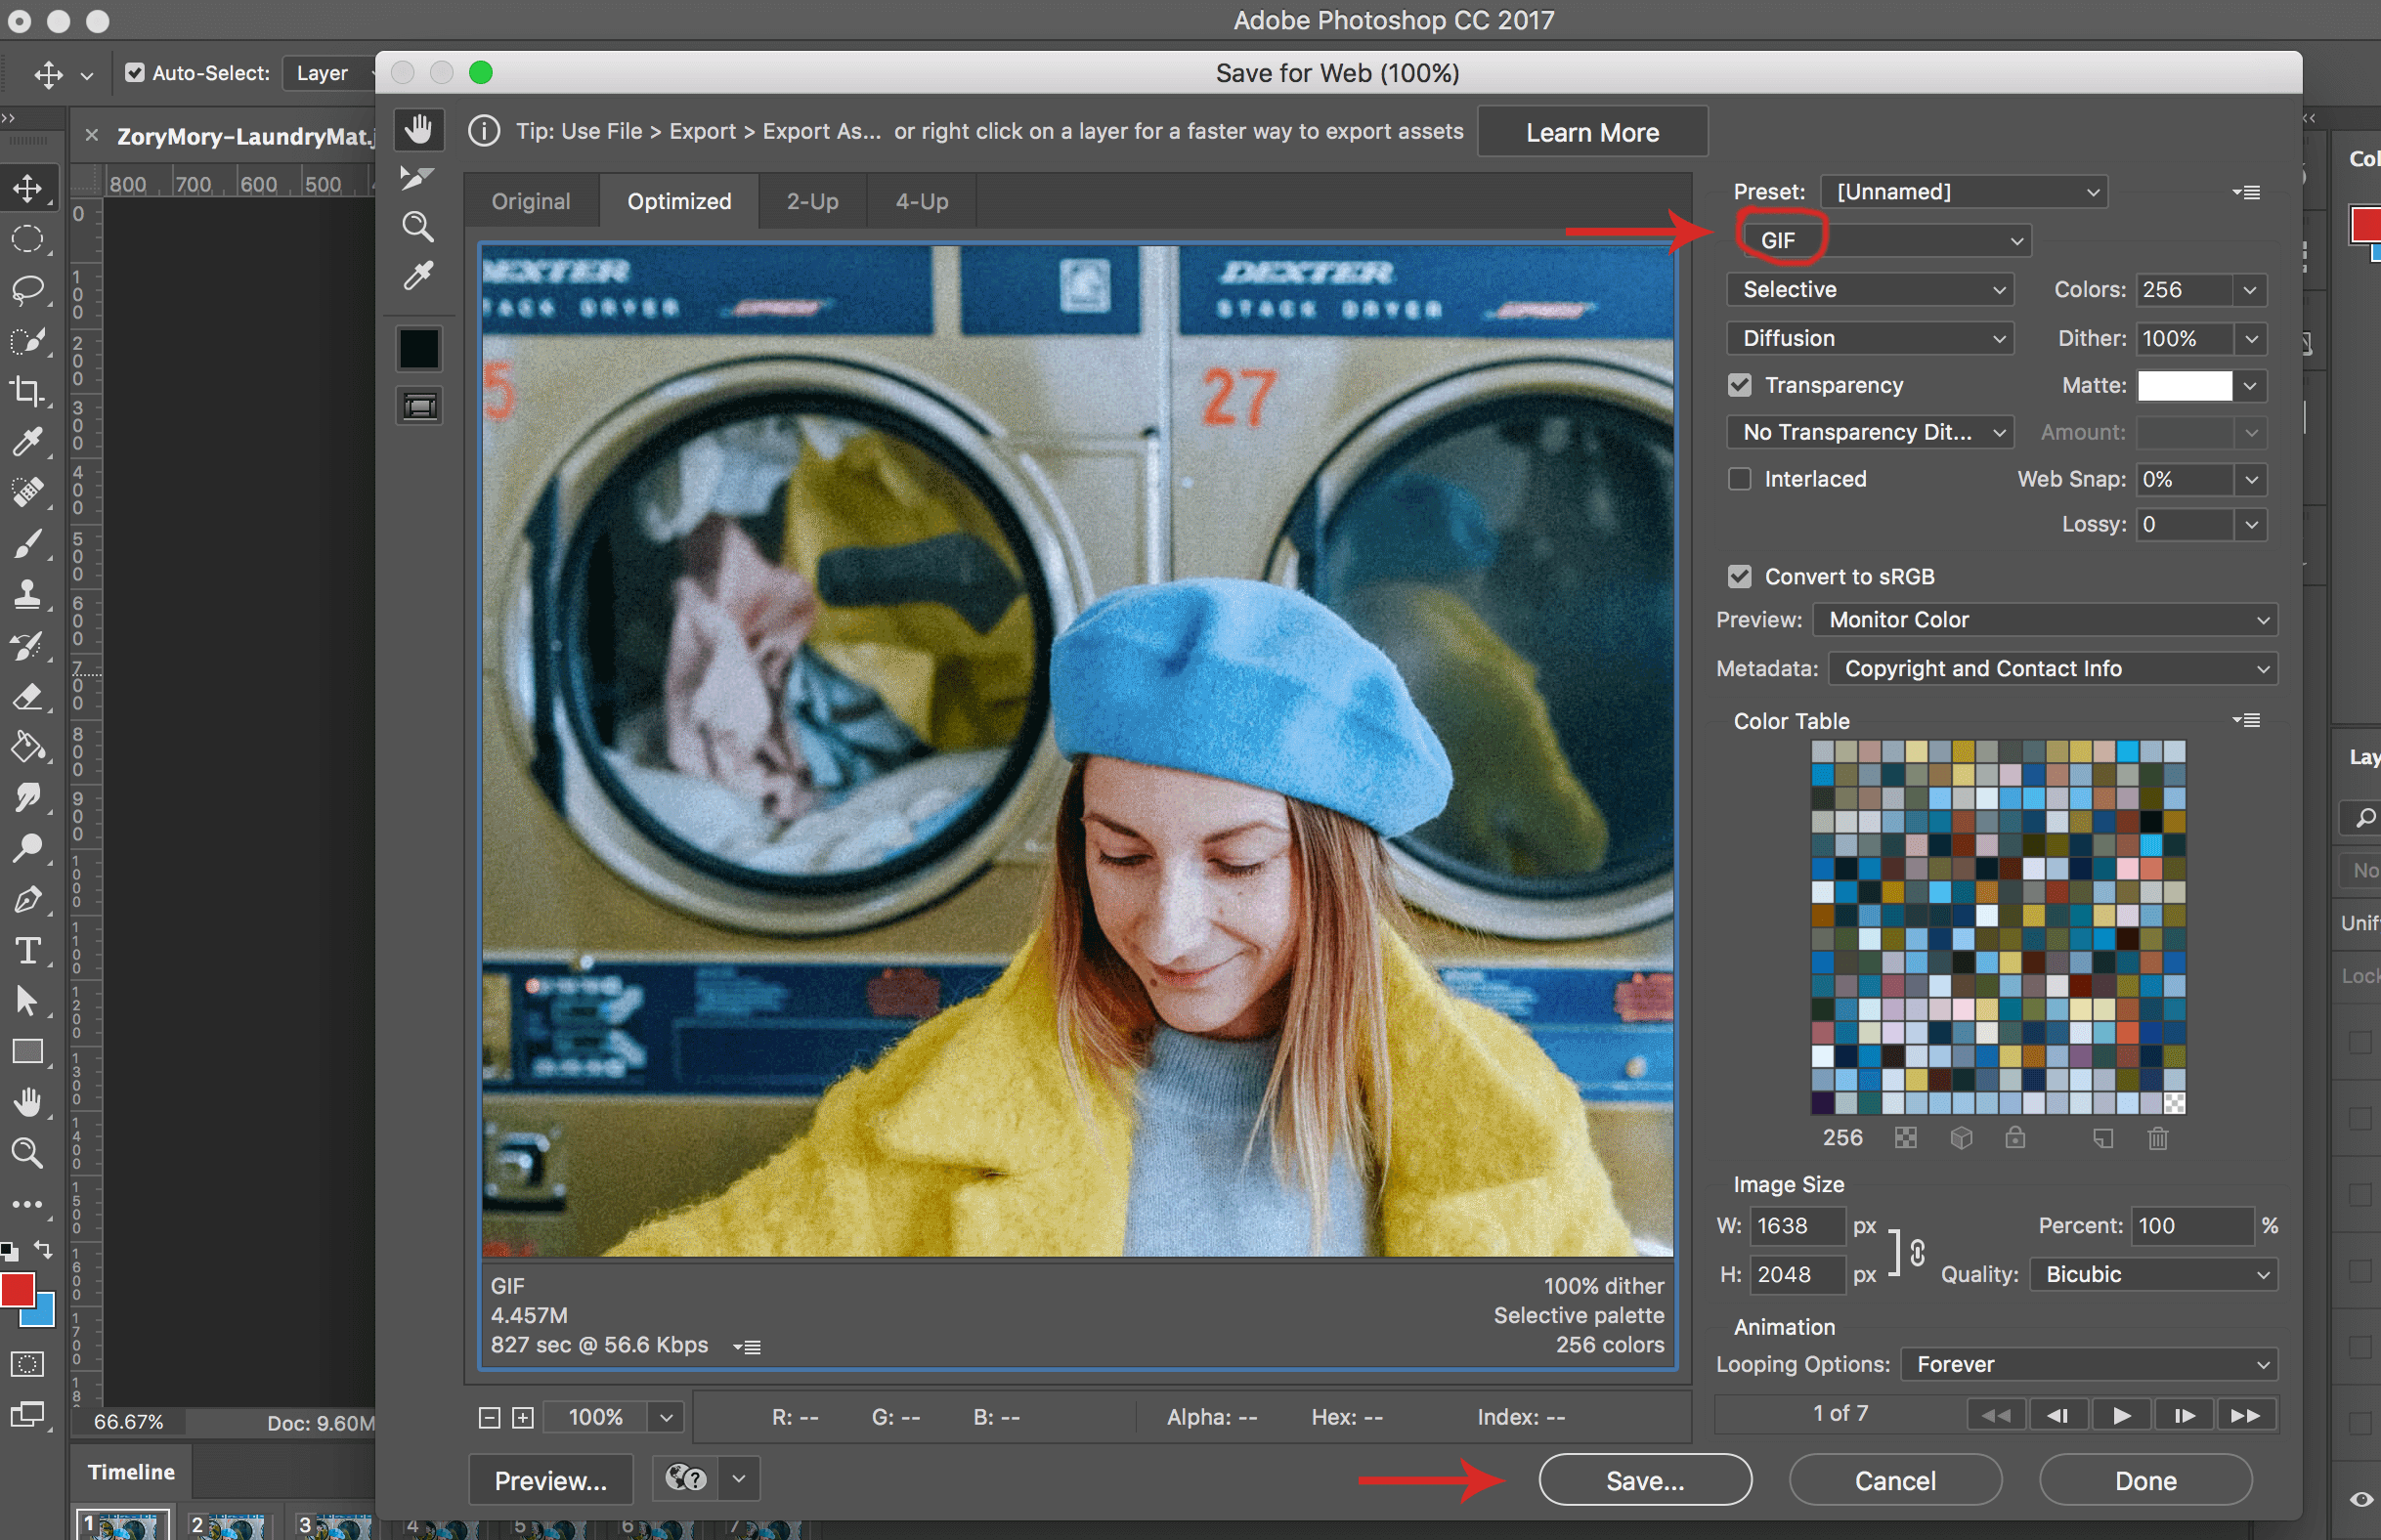
Go to File > Export > Save for Web

In this dialogue box you can optimize the size of your GIF. We will deep dive into these setting in another tutorial for now just make sure the format is set to GIF and click Save
Step 5: Exercise
Congratulations on creating your first ‘faux’ cinemagraph! I’m so proud of you!
It’s best if you go over the tutorial a couple more times while repeating all the steps. Practice makes perfect!
Once you feel confident - for practice you can apply the same process to a photo I found on Unsplash. Download the image HERE and follow the same steps outlined in this tutorial. Your final result should look like this:

Let me know if you were able to do animate the photo and also please leave feedback in the comment section down below. I’d love to know if this tutorial was helpful and/or if any parts were unclear.
Also, please subscribe to our mailing list if you want to see more tutorials on Photoshop and Lightroom! :)

